I’ve started a new blog where I’ll be posting about Programming – PHP, HTML, CSS, JavaScript etc. Also about technology. So do follow my blog there.
My first post was about setting up a website using bootstrap.
I’ve started a new blog where I’ll be posting about Programming – PHP, HTML, CSS, JavaScript etc. Also about technology. So do follow my blog there.
My first post was about setting up a website using bootstrap.
The Windows 8.1 update came out about a week ago. I’ve been using it and I’d like to share a bit about what’s new in Windows 8.1. On the whole, I think this is a welcome update to Windows 8. Microsoft has got some things right. The start screen has become more usable for a PC user and it doesn’t feel like an inconvenience anymore.
I’ll just list out some of the new useful features in Windows 8.1 that weren’t available in Windows 8.
Microsoft has brought back the start button. Unlike the start menu in XP or Windows 7, this is just a button which will take you to the start screen in Windows 8.1.

The search function has been improved a lot. Searching for a word will show you not only files and programs associated with it on your PC, but also information available on the web. One welcome feature is the fact that clicking on search doesn’t take you to the start screen like in Windows 8. In Windows 8.1 the search just appears at the right side of the screen.

The desktop and start screen can have the same background. In my opinion, this is one of the best changes in Windows 8.1. It’s such a small thing but it makes a huge difference in making people actually use the start screen. I’ve pinned all the apps and programs that I frequently use to the start screen and now I feel more comfortable going to that screen to open a program. Previously having a different background just made it seem like you were leaving the desktop, going to the Metro UI and then coming back to the desktop. But it doesn’t feel that way anymore. This option is found under the heading ‘Start Screen’ in the navigation tab of the ‘Taskbar and Navigation Properties’. To get to the ‘Taskbar and Navigation Properties’ – right click on the taskbar (this is at the bottom of the desktop) and click ‘properties’.
You can now boot directly to the desktop. This is a feature that should have been there in Windows 8 when they launched it. This option is also found in the ‘Taskbar and Navigation Properties’. It is coupled with another option to go to the start screen when you close applications. I have no idea why. I found it a bit uncomfortable that closing an app takes me to the desktop instead of the start screen.
These are just some features that I found useful in my daily work while using Windows 8.1. Obviously there are many more updates and features that have been brought into Windows 8.1, but I didn’t really come across them. For a more in-depth look at all new options in Windows 8.1 you can refer to Microsoft’s own website. If you know of something new in Windows 8.1 that everyone should know about, then do let me know!
This post is about the five most common Windows 8 Metro apps that I use. Many of the Windows 8 apps are still relatively new and less functional than their Android or IOS counter parts. But slowly more and more apps are starting to come about and the quality of the apps are also getting better. In my opinion these are some of the best apps available out there for Windows 8 Metro.
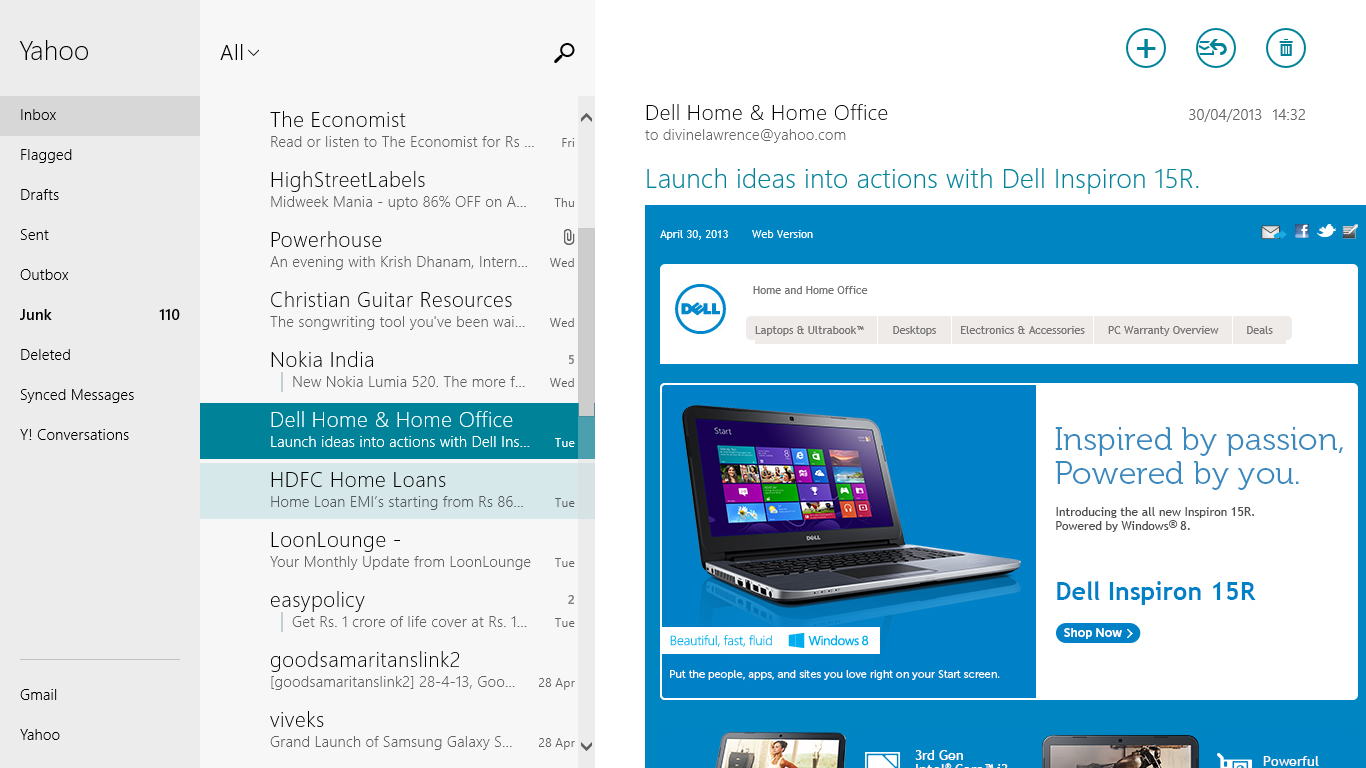
The first one is an app that comes with Windows 8 itself. The Mail app is quite good. It lets you do the basic things you expect from a Mail app. I’ve configured my Gmail and Yahoo mail accounts to this app. This app also lets you add your AOL, Hotmail and Outlook accounts too. The app lets you read your mails, reply to mails, send new mails, delete mails, move mails to different folders, mark mails as unread and finally search within your inbox or other folders for specific words. A recent update has also added more advanced options like creating and editing folders.
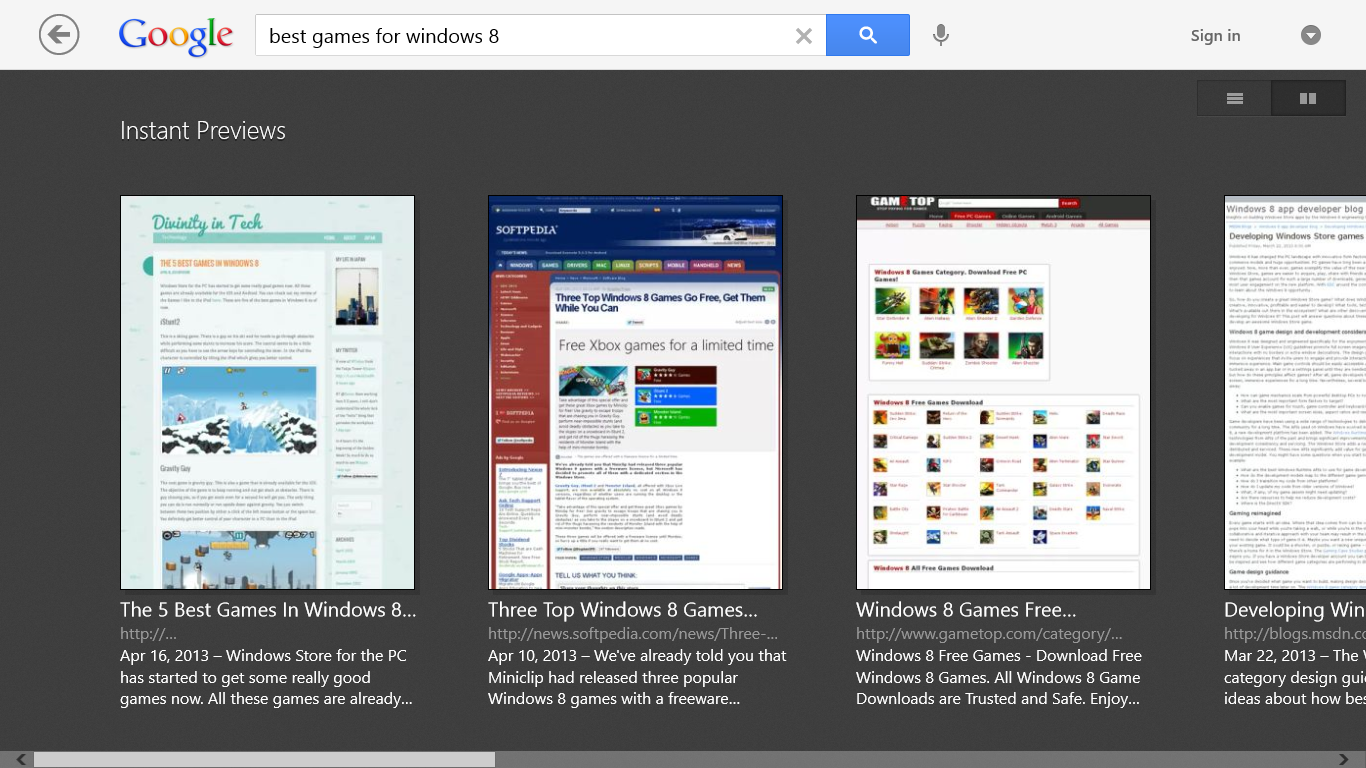
The Google Search app is another app that is really nice for Windows 8. The thing I like the most about this app is its simplicity. In the settings you can either set it to open links in the same app or open the links in the default internet browser. Another cool thing in this app is the Instant Preview mode. When you set this mode, instead of listing the search results, it shows you a preview of each website. The search history option is also very useful.

I think Milligram is the best Instagram app available for windows 8 yet. Though you can’t add photos with this app, viewing the instagram accounts you follow is very nice. You can like, comment on pictures or even save the pictures to your computer by clicking on the picture.

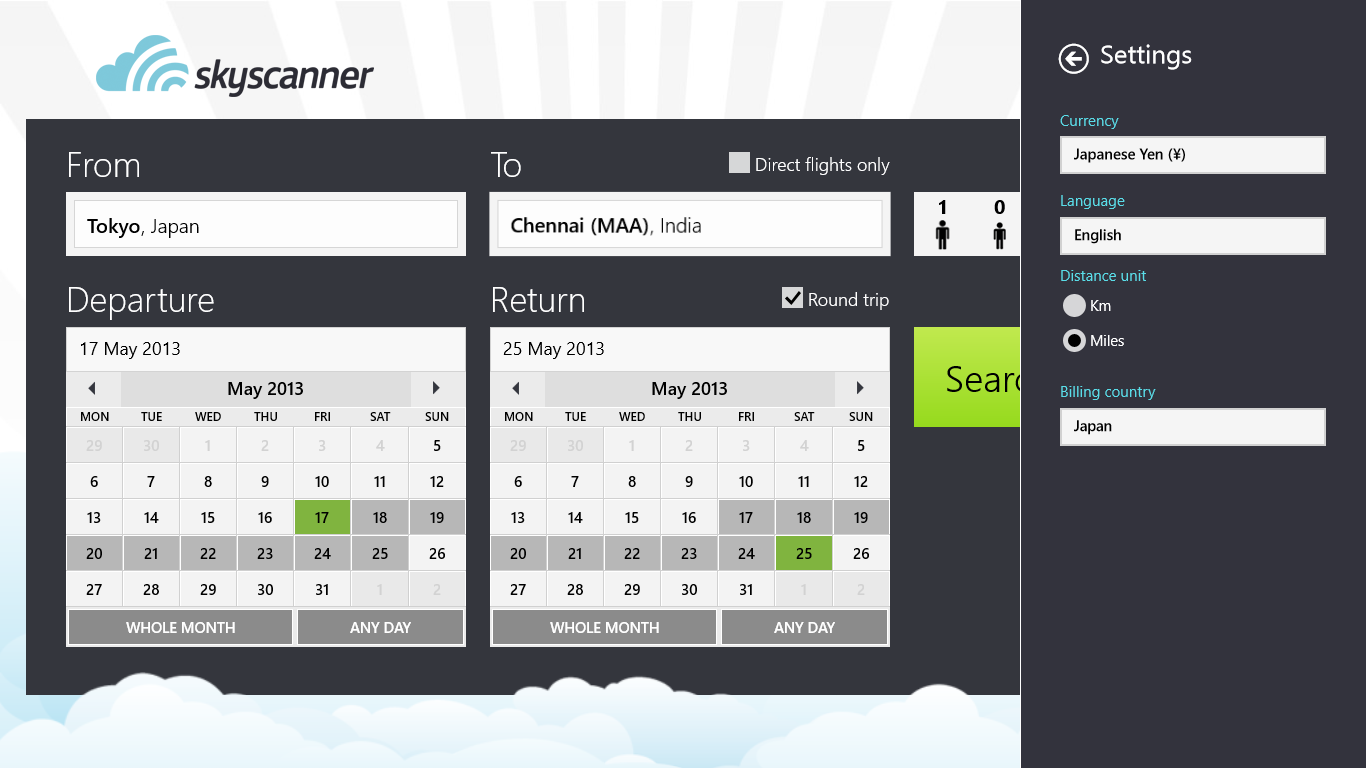
For travellers out there, the skyscanner app is an extremely useful app. I was quite impressed with the functionality of this app when I first downloaded it. Usually most metro apps are scaled down versions of a desktop program or webpage or something like that. But this app is fully functional from what I can see and it is also very aesthetically pleasing. In the settings you can change your language, currency, distance unit and billing country.
The Bible app by YouVersion is my final app suggestion in the post. For anyone looking for a bible app on Windows 8 Metro, this is the best one. As with the IOS, Android and other versions of their apps, they give you a lot of options on the bible versions. Audio option is also available on some versions. Another interesting option is the parallel reading option. Using this you can read two versions on the same screen. This is very useful when you want compare versions.

Like I said earlier, lots of new good apps are being developed for Windows 8 Metro UI. Do you know of any other good apps for Windows 8?
Windows Store for the PC has started to get some really good games now. All these games are already available for the IOS and Android. You can check out my review of the Games I like in the iPod here. These are five of the best games in Windows 8 as of now.
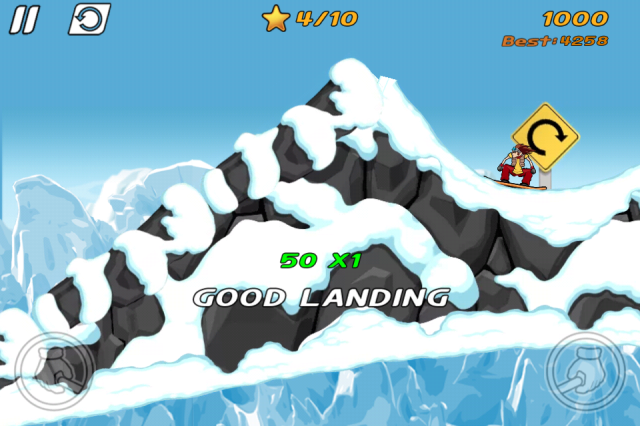
This is a skiing game. There is a guy on his ski and he needs to go through obstacles while performing some stunts to increase his score. The control seems to be a little difficult as you have to use the arrow keys for controlling the skier. In the iPod the character is controlled by tilting the iPod which gives you better control.

The next game is gravity guy. This is also a game that is already available for the IOS. The objective of the game is to keep running and not get stuck at obstacles. There is guy chasing you, so if you get stuck even for a second he will get you. The only thing you can do is run normally or run upside down against gravity. You can switch between these two position by either a click of the left mouse button or the space bar. You definitely get better control of your character in a PC than in the iPod

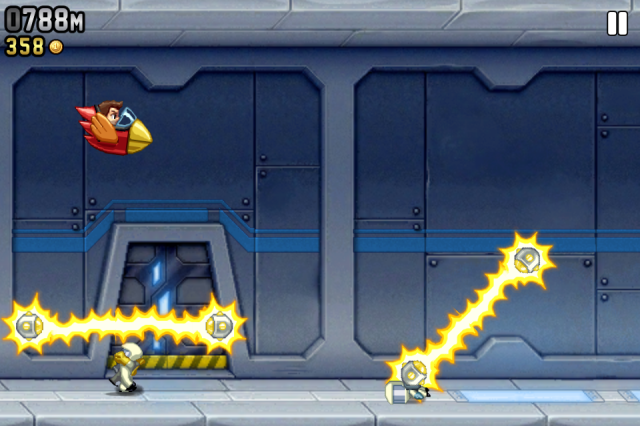
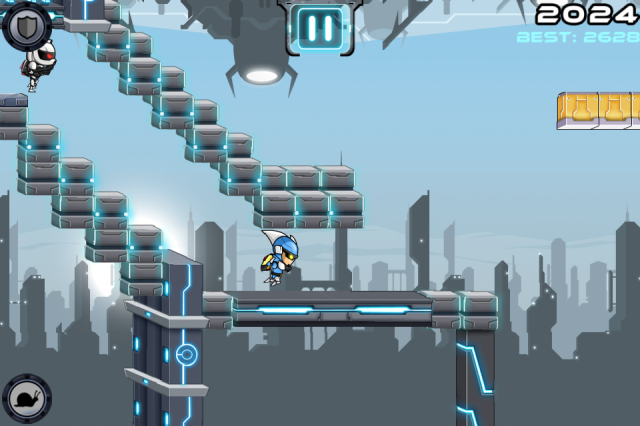
This is a very simple game. There is a guy running forward and he can also fly using his Jet Pack. The objective of the game is to keep going forward without touching the flames or getting zapped by the laser beam or getting hit by a rocket. On the way you have to collect as many coins as possible. There are three missions assigned to you to complete at a time. As you complete each mission you level up and the missions become more complex. You may have to repeat the game several times to finish a single mission. You get bonus vehicles sometimes and if you’re riding them and you get hit by any obstacle only the vehicle gets destroyed and you you will continue with your Jet Pack. In this game also, controlling your character is much easier on the PC, especially with the left mouse button.

This is another interesting game. It’s kind of like a puzzle. Agent P is stuck in a container and the only way to free him is by directing the water towards the right direction. Some of the levels are quite challenging.

This is my final game in this review. Brain Cube Reloaded is a puzzle game. You have to direct the block along the maze from the starting point to the end destination. Of the five games, this is the most challenging game in terms of having to think.

Hope you liked the games. Like I said earlier Windows 8 has started to get some really good games now. So if I do play some other games in the future I will definitely write about them. If there are any other games that are interesting do let me know.
And as always, if you have the time do check out my Personal Blog
I’ve got a dual screen set up at my home with my laptop (Dell Studio) and the TV (Sharp – HDTV). The second screen is to my right while the first screen is in front of me usually. The multiple screen set up is really nice to have, especially if your second screen is an HDTV. You can instantly watch videos on the TV while you work on your laptop or desktop.

To setup the dual screen you’ll first need two screens (obviously!) then you’ll either need a VGA cable or an HDMI cable depending on what your laptop/desktop and second screen offer. I’ve used a VGA cable for my set up though my laptop and TV have the option to use an HDMI cable too. Like most new systems, it’s pretty much plug and play and you don’t need to restart your computer or TV.
Similar to other Windows OS like XP, Vista or Windows 7, Windows 8 also offers four options for use with a second screen. In Windows 8 to turn on the second screen you have to go to the Charms menu. If you are not quite sure how that works, do read my other post about how to use Windows 8. Once the Charms menu comes up, the fourth Icon says ‘Devices’, when you click on that it shows ‘Second Screen’ and clicking on that brings about the four options to use the Second Screen. Alternatively you can right click on the desktop, click on Screen resolution and check the ‘Multiple displays’ option also to turn on or off the second screen. These are the four options available.

The usage of the four modes are pretty much based on individual preference and also based on which is your primary monitor and which is your secondary monitor. You can use either your laptop or your other screen as your primary monitor and you can switch them any time you like. I use my laptop as the primary monitor and use the second screen which is a TV as my second monitor. So mostly when I’m just using a single screen it will definitely be my laptop screen. I use ‘Second screen only mode’ if I’m watching a movie or something. One thing I’d like to mention is the fact that the duplicate mode doesn’t work in my set up. I’m still not able to figure out why. The mode I use the most is the ‘Extend’ Mode. This way I can use the two screens for different things. All the remaining things that I’ll write about will refer to this set up only.
If you right click on either of the screens in the general desktop area you can see the option ‘screen resolution’. Clicking on that will open the screen resolution settings page. Here you have the option to change either of your screens to function as the primary screen. You can also change the resolution of the both screens separately. There are some other settings you can change here too.
Generally the desktop icons are in the primary screen but you can move them to the second screen if you want. At any point if you turn off the second screen then the icons from the second screen will automatically move to the first screen and switching the second screen back on moves the icons back to the second screen also. Though the taskbar appears on both screens, the clock and system tray only appear in the primary screen. There are two other settings available for the taskbar in the multiple screens setup. You can make the taskbar only appear in the primary screen or appear only in the screen where the program is active. To see how to change this and also for some other useful information about how to use multiple monitors refer to this link from Microsoft
One thing that I like about the dual screen setup in Windows 8 is that it gives you the option to use one of the screens for the desktop while the other screen can be used for the metro applications. I mostly use the metro apps in the second screen while I run the desktop in the laptop. To open the start screen you can either go to the charms and click the icon for start or you can press the windows key on the keyboard. The start screen will appear on whichever screen you brought out the charms bar in. Some things that I’d like to point out about the usage of the metro UI are
The only thing I found quite inconvenient in my setup is that, if I have to bring out the charms menu in my primary screen (The Laptop) I have to be careful when I move the cursor to the right edge as I can end up moving the cursor straight into the second screen without bringing out the charms.
So that’s how I use the dual screen setup. Do let me know if you know any other tricks/tips on using multiple screens in Windows 8 or if I’ve left out any important features or functions.
Windows 8.1 is currently out, do check out what’s new in Windows 8.1
Please leave a comment if you find the information here useful and do check out my personal blog if you have the time!!
I just got a new Nokia Lumia 510. This is going to be a review of some of the features in it. I think many of these will be similar in other Nokia Lumia phones too as they run Windows 7.8
The Box comes with the phone, battery, ear phones, plug point charger and the USB cable. My phone came with Windows 7.5 installed in it. I took it to the Nokia Center where they upgraded it to Windows 7.8 for free. This phone uses a Micro-Sim.
 s
sThe Screen has three touch buttons at the bottom.
The first one is the back button. It does what it’s supposed to do and takes you to the previous screen you were looking at. Holding this button for a couple of seconds brings up a menu that shows you the five previous apps you have used and you can click on any off them to go straight to those apps.
The next is the windows button. Clicking on this will take you to the start screen. This is also sort of like ‘Close’ button. Apps can’t be closed in a windows phone, so when you’re in an app you just have to click the windows button to go the the start screen and open a new app. The app that you just came out from may run in the background or be closed based on how much RAM it is using. Not closing an app doesn’t slow down your phone in any way.
The final touch button is the Search button. This takes you to Bing search engine and if you search for something it will list the search results. Clicking on any of the results will open that webpage in the built in Internet Explorer.
There are three other buttons on the side
The first one is a Volume control. This can be used to control the Volume of the Ringer. This also controls the total volume of the phone. So if you’re listening to music, this button will also function as your volume control for that. This can be quite frustrating sometimes because if you reduce the volume while listening to music and forget to increase it later, you may not hear your phone ring when you get a call. Clicking on this brings down a mini music player menu which can play/pause music and skip to the next or previous track. This menu also has the option to put the phone on vibration mode.
The Second button is used to lock/unlock the phone and also to turn on or off the phone. To lock the phone, just click it once. To Unlock you’ll have to click it once and the slide the lock screen wallpaper up on the touch screen. To turn off the phone, click and hold this button for a couple of seconds and an option will show up saying ‘slide down to power off’. Sliding this down will turn of the phone. To turn it back on just hold this button for a couple of seconds when the phone is off.
The Last button is the camera button. This has a few interesting functions. I’ll explain them when I talk about the camera.
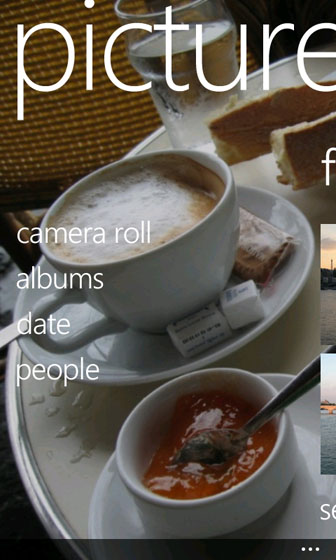
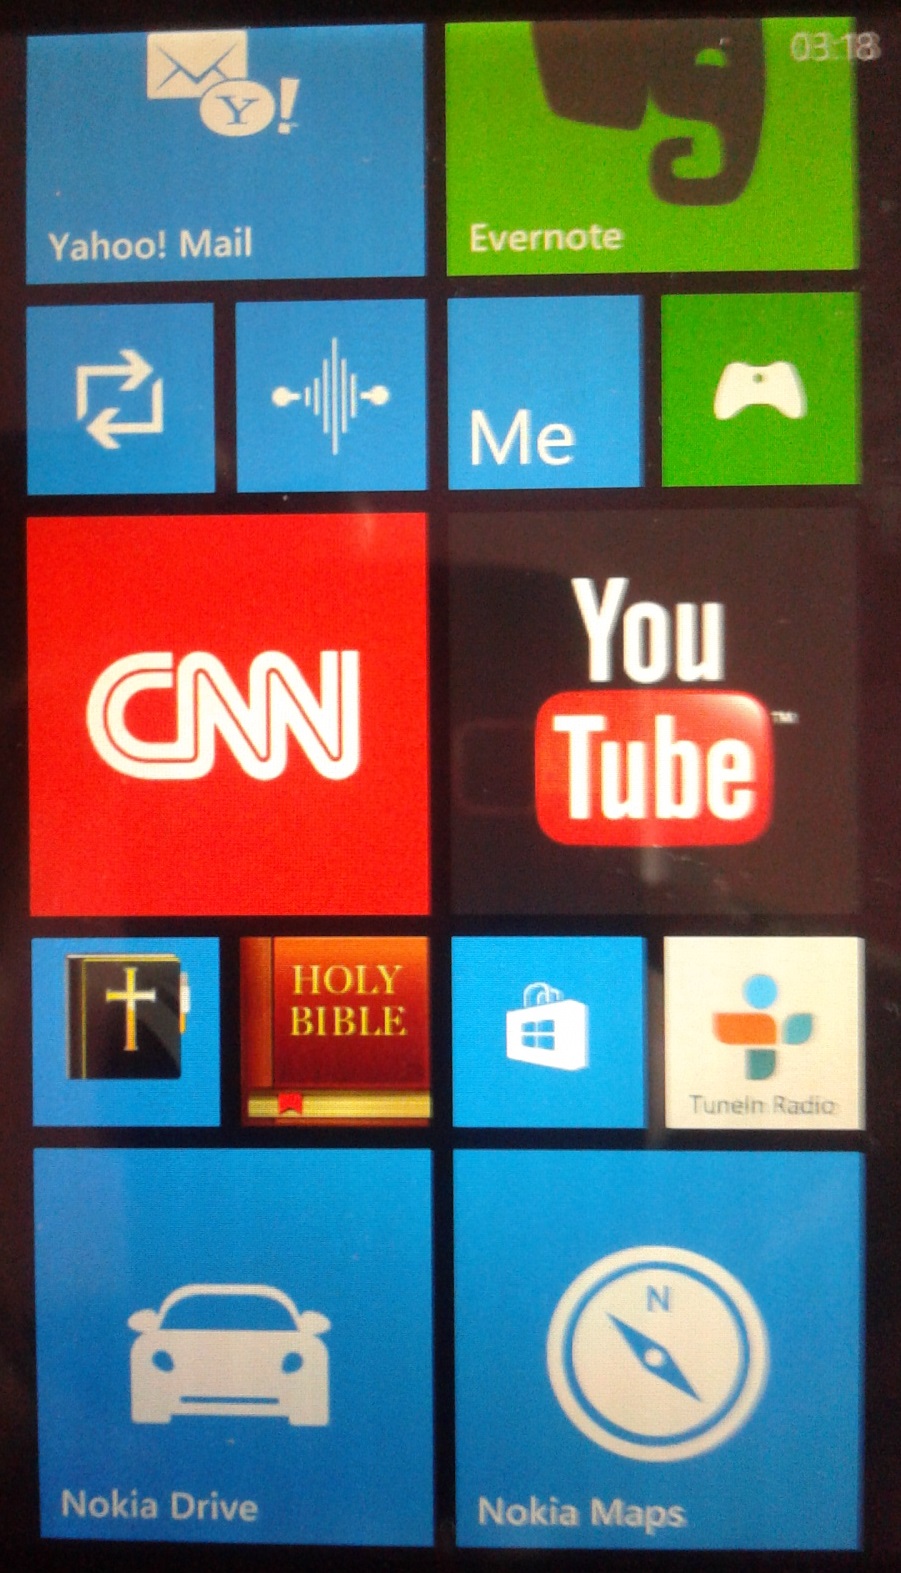
 The start screen has all your apps. The apps appear as tiles. Some of these tiles are live tiles, meaning they show live information. To open any app you just have to click on the tile. You have the option to re-size the tiles. Windows 7.8 has three sizes. But the largest size is only available for some selected apps (calendar and pictures). To re-size an app just hold down on the tile for two seconds. It will give you the option to either re-size the app or unpin from the start. You can move the apps around and re-arrange your start screen by holding down on a tile and dragging it around. In the settings you can change the theme colour which is basically the colour of the tiles and also set the background to dark (black) or light (white).
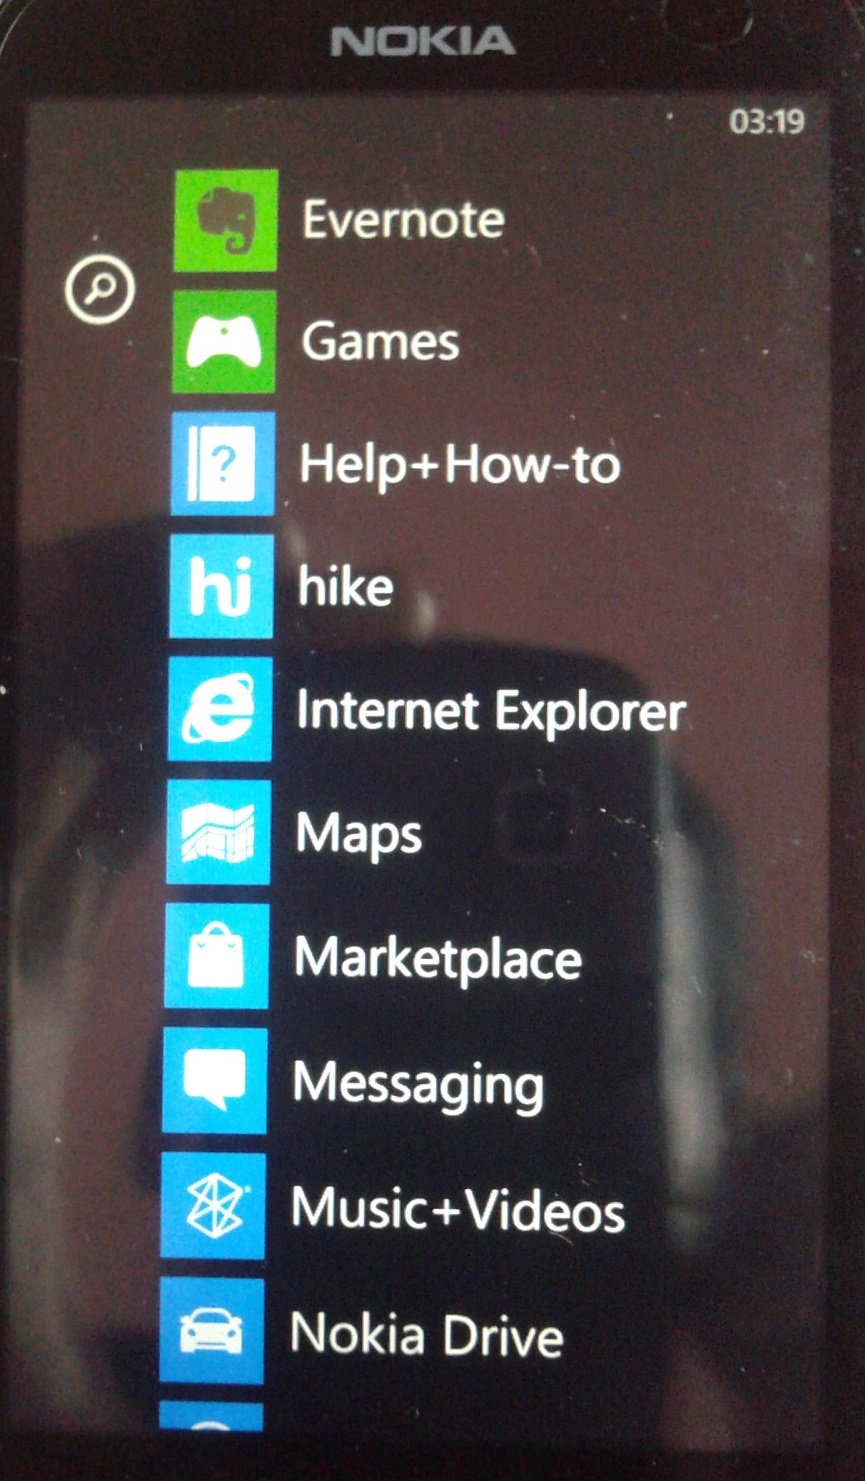
The start screen only shows some of the apps that are in your phone. To see all the apps in your phone just slide to the right from the start screen and all apps in your phone are listed here. You can also go to this screen by clicking on the side arrow that appears at the bottom of the start screen if you scroll all the way down. To open an app click its icon. If you press and hold on an icon here for a couple of seconds it’ll show you three options – Pin to start, rate and review and uninstall. If it’s an app you use frequently, it’s best to pin it to the start. There is also a search option at the top left of the screen here.
The phone call app is the first tile in the start screen. Clicking on it takes you the history of calls. Here all your latest incoming and outgoing calls are listed. The numbers have a small ‘phone’ icon next to it, clicking on which will directly call that number. If you click on the number instead, it takes you to a menu that gives you the option to either call that number, text that number or save that number to your Phone. At the bottom of the History menu there are four options. Voice mail – To configure your voice mail, Keypad – To type phone numbers to call, People – which is the contacts list (Phone book) and Search – This only searches through your history of calls and does not search your People app. At the end of the four options there are three dots ‘…’ you will see this in many apps. Clicking on this will bring about extra options or settings available for that particular app.
This is the contacts list. Windows calls this ‘People’, this is because you can pretty much sync all your contacts from Facebook or any Mail account here and manage them all together. You can then sync all your contacts with your Windows Live ID. At the bottom of this app is the ‘+’ option which lets you add a new contact or a new group. There is also the option to import your contacts from your Sim.
This is used to send SMS. This is pretty straight forward. The first screen in the app shows you your messages as threads like most new smartphones. At the bottom is the ‘+’ to send a new message to some one. The settings has the option to get SMS delivery confirmation. This app can also be used for online chat like Facebook chat I’m told, but I haven’t tried that.
Calling and texting used to be the basic functions of a phone, but I’m not sure if you can call that basic anymore. But anyway I’ve listed the other features in the phone below.
There are couple of ways to open the camera app. In the start screen you can click on the camera tile to open the camera. Or you can click and hold camera button at the side of the phone. Clicking and holding the camera button even when the phone is locked will automatically unlock the phone and take you to the camera app. To take a picture there are two ways again. First is to use the camera button at the side. This has to be half clicked to focus and once it’s focused you’ll have to fully press the button to take the photo. The second method is to just tap the screen. You have to tap that portion of the screen which you want to focus. When you tap that portion, the camera will automatically focus that side and take the picture. The pictures taken are saved in the Camera Roll folder in the Pictures app. The Lumia 510 has a 5 Mega pixel camera. The photos taken are pretty good for this range of phones.
At the bottom of the camera app there are some settings that you can use like Scenes, White Balance, Exposure Value, ISO, Metering Mode, Effects, Contrast, Saturation, Focus Mode, Resolution and Flicker Reduction.There are a couple of other settings that you’ll need to be aware of in relation to the camera app. These settings are in the settings app –> applications –> pictures + camera.
Video mode – this option is also available in the bottom of the camera app. Clicking this will change the camera to video mode. To take/stop a video either tap the screen or click the camera button.
This phone comes with an inbuilt Internet Explorer app. I believe this is IE9. It functions like a standard mobile browser. The settings has the option to add websites to your favourites. You can also pin a particular website to the start menu if you use it that frequently. Websites can be opened in Tabs so you don’t have to close one website to open another.
This is not the Nokia Music app but the Music + Videos app. I find this app better than the Nokia Music app to play music. You can use this app to play the Songs, Videos and Podcast that you have stored in your phone. It also has an FM radio. You have to connect your ear phone for this to work. The player is nice and the ear phones that came with the phone are actually pretty good. I read somewhere that they weren’t that great, but I found it quite good.
 This app is where all the photos and videos are stored. This has a Camera Roll folder where all the photos or videos you’ve taken with the phone are stored. Then there are other folders created by syncing photos and videos from your computer. There is no way to rename these folders in your phone. Whatever name you have for the folder in your computer is the same name it will have here. I found it interesting that there was no option to delete multiple photos on the phone. You’ll have to use the Zune software for this. This can be quite frustrating I think.
I just want to say a bit about this software here because this is used to sync songs, videos, podcast and photos to your Nokia phone. This Software is really easy to use. You have to add songs to your Windows Media Player Library for it to show up in your Zune library. And from here it’s pretty much just drag and drop into your phone. To add photos, my suggestions is to create a folder or folders with the photos you want to sync in the ‘My Pictures’ folder in your computer and then directly drag that folder into your phone. If you have photos in different folders in your PC and then drag each photo into your phone this will create many folders which could be quite messy on the phone.
I’m a huge hater of itunes because it automatically transfers purchases and doesn’t let me just sync just the things I want at a time. Like if I want to just sync an app, it will start syncing some album I recently added to my music library even though at that point of time I don’t want to sync any music. So when I used the Zune, it was a pleasant surprise as to how easy it was to sync things.
Opening the app has a day view. It shows you your schedule for the day. At the bottom are options to add a new appointment or view the monthly calendar. I think there is no option to sync any other calendar like your Goolge Calendar or something.
The mail app has the option to add your Windows Live Account, Outlook Mail, Yahoo Mail, Google Mail or other such accounts. This app is also quite standard. You can read mails, send new mails, reply to mails, view folders etc. In the Yahoo Mail account I checked there is no option add folders, but you can move mails to already existing folders.
I haven’t had the chance to use these apps much. But one of the coolest features in this is that you can download the map. For example I’ve downloaded the Tamil Nadu map. Once downloaded you don’t need the internet while using it. You just need to set the destination location and there is either a 2D or 3D drive type map showing you how to get there.
This phone has an Office app. This is quite limited. But you can create new Word, Excel or PowerPoint files. You can edit them. This is connected to your SkyDrive so you can sync documents from your PC and edit them on your phone or create documents on your phone and then later edit them in your PC
Microsoft has it’s own Marketplace for Windows Phone apps. Apps are quite limited I should say when compared to IOS or Android. But I’m sure it will pick up or so I hope. Some of the apps I’ve installed from the MarketPlace are
There are some other inbuilt apps that I didn’t really talk about like Alarms, App Highlights, Bluetooth Share, Calculator, Contacts Transfer, Games, Maps (Microsoft), Nokia Music and Ringtone Maker.
I’m summarizing as Windows/Nokia because I think if there are Pros and Cons both Microsoft and Nokia are somewhat equally responsible for that. This is an entry level phone for Touch Screen Smartphones so it should be graded based on that and not in comparison with flagship model phones
Windows 8.1 is currently out, do check out what’s new in Windows 8.1
Please leave a comment if you find the information here useful and do check out my personal blog if you have the time!!
These are some of the ‘Running’ games or ‘Endless Running’ games that I like in my iPod. These are simple, fast and fun games that don’t require much strategy. They just involve some guy running, flying or skiing. Most of them are either free or Rs.55 in the Itunes App Store. I’ll try and give a short introduction about each game
This is a very simple game. There is a guy running forward and he can also fly using his Jet Pack. The objective of the game is to keep going forward without touching the flames or getting zapped by the laser beam or getting hit by a rocket. On the way you have to collect as many coins as possible. There are three missions assigned to you to complete at a time. As you complete each mission you level up and the missions become more complex. You may have to repeat the game several times to finish a single mission. You get bonus vehicles sometimes and if you’re riding them and you get hit by any obstacle only the vehicle gets destroyed and you you will continue with your Jet Pack
This is quite an exciting game too. There is a guy on his ski. Your mission is to ski forward and when you jump of a ramp you need to ensure that he doesn’t lose his balance and fall down. There is an avalanche that is chasing him and if he falls down the avalanche may get him.
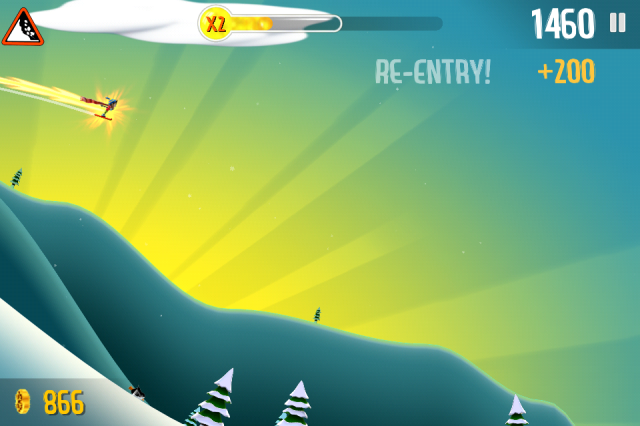
iStunt 2 is also a skiing game. But here there is no avalanche chasing the guy and you are scored based on tricks you can do as you ski.
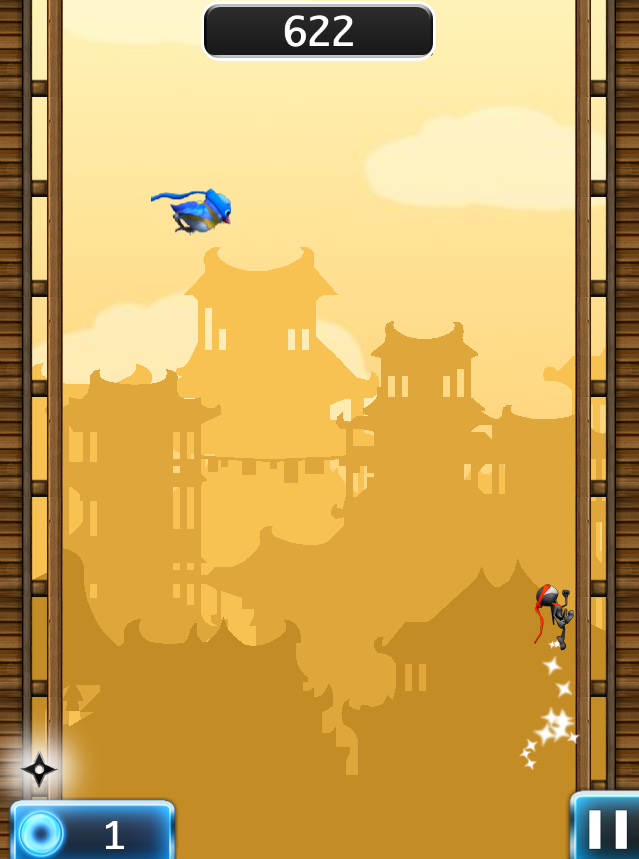
This is one of my favourite games to play. The game play is very simple. There is a guy running up the wall and he needs to avoid obstacles that come his way. The only thing that he can do is jump from one side of the wall to the other. When he jumps across if he hits something he kills/destroys it as he is swinging his sword. If he hits the same thing thrice then he can travel for a small distance in a hurry and nothing will harm him during this time. There is also a shield that he can acquire sometimes which will protect him for one hit which will result in him losing the shied. NinJump also has another edition called NJDX free which offers three more types of game play.
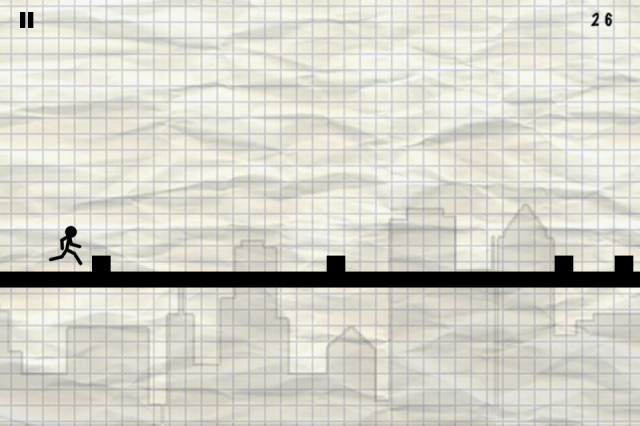
Line Runner is another fun game. This is a very fast moving game and it’s quite difficult to get high scores in advanced tracks. The hero is always running and he can either jump or roll to avoid obstacles. You are scored based on how far you can go without hitting an obstacle.
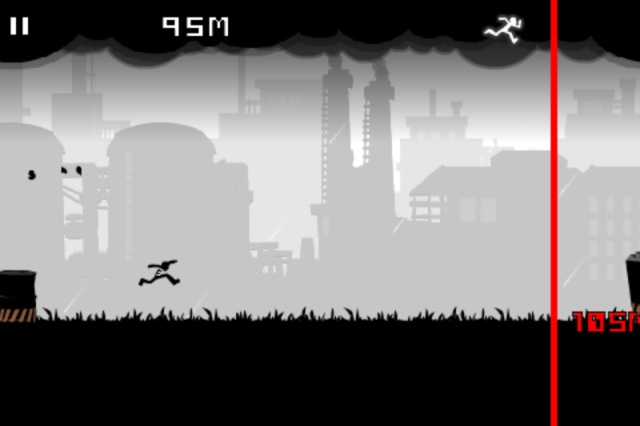
This is quite an interesting and a different type of game. There is a guy running and he can either run normally or run upside down against gravity. He has to avoid the obstacles by switching his running mode. He is always chased by a bad guy so if he gets stranded even for a second the bad guy will get him and he has to start over. The other way in which he could get out is falling into a hole or flying into space while running upside down.
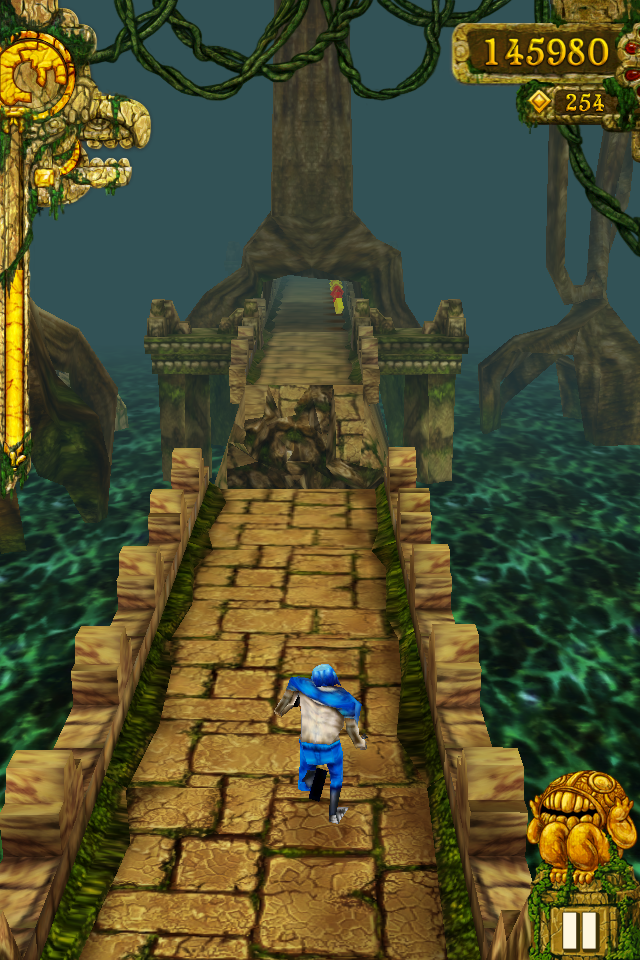
This game needs no introduction. It is one of the best games around. The game play is just a guy running away after stealing an Idol. There are some demons chasing him. You can jump over or slide under obstacles. When you reach the end of a road you have to swipe left or right to keeping running on that road. The aim is to run as far as possible and not fall down into holes, get hit by obstacles or get caught by the demons. Along the way you’ll have to collect as many coins as possible. If you have lots of coins then there are many power ups available. Temple Run 2 is also now out so do try that as well. Temple Run 2 has better graphics, but on my iPod 4th generation it sometimes gets stuck. And as with most of these games getting stuck even for a fraction of second usually means you’re out!!
This is a nice and easy game where you have to jump over or slide under the obstacles. Sometime you may have to run along walls for a short period of time.
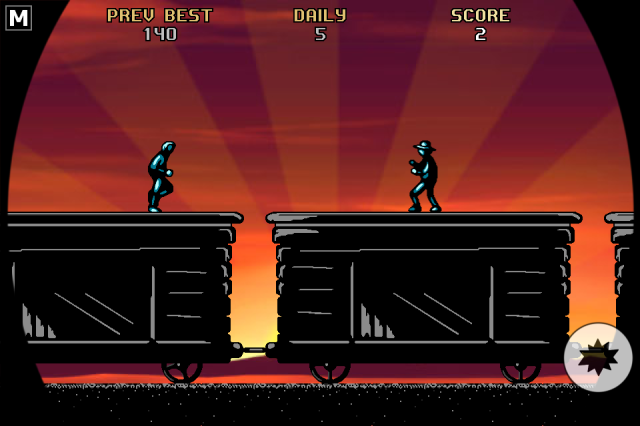
Action Hero is my last recommendation for these type of games. This is also quite an exciting game and I have a hard time getting more than 220 which is my highest score so far. There is guy running on top of a train and he need to punch bad guys out of his way. Along the way he also needs to jump over some obstacles and duck under some. When the game gets fast it’s quite difficult to duck under obstacles sometimes!!
Do try these games and let me know if you like them. If you have any suggestions about similar games, let me know.
Check out my personal blog if you have the time!
This article is about setting up a Simple Blog in WordPress.com. One thing you’ll need to know is that WordPress.com and WordPress.org are two very different types of blogging platforms. WordPress.com is for simple and basic blogging and is free. But WordPress.org is for self-hosted blogs and you need to pay to get a domain first. So we’ll only be looking at WordPress.com
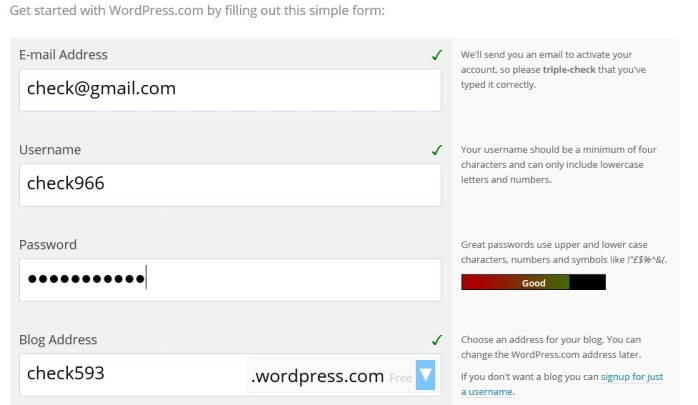
First you need to sign up for a blog. The four things you’ll need are Email Address, Username, Password and Blog Address. Any of these can be changed later if needed.
Once you sign up, you’ll get an email to activate this account. Clicking on that link will take you directly to your blog. Here you’ll be asked to follow some basic steps to setup the blog. These are the steps
Clicking finish will take you to another page that has the below six tabs in it
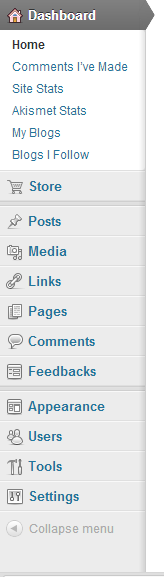
To go to the Dashboard there are two ways, first way – Go to the top left corner where it shows the name of your blog, if you hover over it, there is a drop down menu that has the Dashboard. Or alternatively if you go to the top right corner of your screen, it shows your user name. Hovering over this brings a drop-down menu that has your blog name and in that again Dashboard is present. The Dashboard has many features in it. I will only be going through most important ones needed to setup a blog.
Posts – Here you can view all the posts you’ve made so far and then open them to edit or delete the posts here. You can also add new posts from this place
Media – This shows the all the Media content (photos, pictures and videos) you’ve uploaded in your blog. WordPress has a limit of how much media you can upload. The limit is 3GB. It’s quite a lot and I don’t see myself finishing that quota any time soon using photos and pictures. But videos can be a problem so it is always good to just use Youtube links if you want to post video
Pages – In the same blog you can have many pages. So one of the pages can be your actual blog and you can use other pages to show some general information like about, contact us, history and mostly things that you don’t need to update very often. One of the pages can be your blog that you use to post things frequently (or infrequently)
Appearance
Users – WordPress can be used to set up a website so you can actually give more people access to your website (or blog) using this page. You can limit what each person will be able to do within the website though using the User roles. You can check out user roles here
Tools
Settings – All your settings are in this tab. Things like your Blog Name, Tagline, Time Zone, Email Address, Media etc., are here
There are so many ways to add a New Post. You can do it from the posts tab from the Dashboard or go to the top left corner where there is a ‘W’ and hover over it to get a drop down menu that has ‘New Post’ or go to the top right corner where is says ‘New Post’.
Opening the ‘New Post’ from the Dashboard opens a screen that says ‘Add New Post’ at the top. But opening a ‘New Post’ using the other two methods takes you to another screen that doesn’t have this title. I don’t see the need for these two screens. But you can perform the same functions in both these pages. The options here are pretty straightforward. Things you can do are in the picture below.
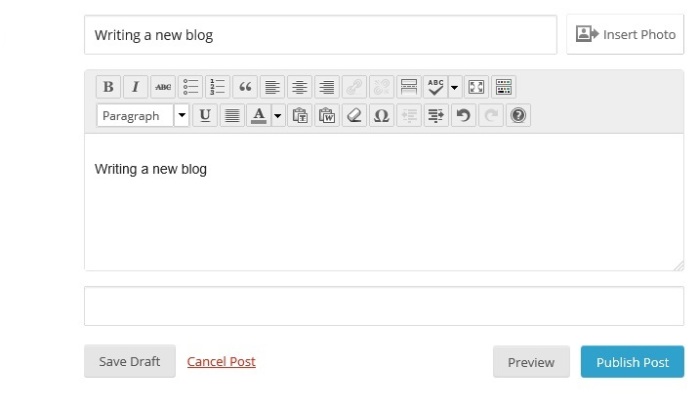
It’s interesting that you can’t change the font unless you use the html editor. But in most themes the font goes well with the theme so there won’t be any need to change it, but in case you want to change this, then the only way is to use the html editor
When you’re done writing content and adding images (if you want) you have the options to Preview the Post, Publish the Post, Save Draft or Cancel Post
I’ve been using Windows 8 for a month now and thought I should write a page about the basics of using Windows 8. Most of the things that I’ll be talking about have to do with the new Metro Interface. But I’ll talk a bit about the Desktop side of it as well.

This is the start screen. As you can see it has all the apps which appear as live tiles. The tiles have two sizes – small and large. And they have two options live tile on or live tile off. To change these all you have to do is right click on the tile and it gives you the option to make the tile smaller or larger depending on the size it is now and it also gives you the option to turn the live tile on or off. The size and live tile on/off function depends on the app. Some apps don’t have the option to make the tile smaller/larger or turn live tiles on. You’ll notice that the tiles are already grouped. Tiles can be moved within the group or to a different group by just clicking on them and dragging them around.

Creating a new group
To create a new group, you have to drag a tile to the center space between two groups till a small bar appears and then you can leave the tile in the new group. Then you can move other tiles to this group. To name a group go to the bottom right corner of your screen and click on the ‘-‘ (minus) sign there. The tiles becomes smaller and it’s easy to view the groups in this screen. Now right click on the group and you find the option to name the group. The tiles in this screen can be the icon for the apps in the metro UI or for programs in the desktop. So depending on the app/program, when you click on the tile it may open here or in the desktop screen.

Charm
Next we come to the Charm. To bring out the charm bar you have to take your mouse pointer to either the bottom right corner or the top right corner of the screen. Moving the pointer to just the right side will not bring out the Charm, you have to go to the corner. Once the Charm appears and you move your cursor over it, the time and date appear on the lower left corner of the screen. The Charm has five options in it.
In the start screen, left-clicking on the top left corner of the screen makes it toggle between the different apps that are open. While toggling through the screens, the desktop will only appear once, meaning the different programs that are running in the desktop will not be toggled through. The desktop almost functions like a single app. In the desktop mode or the start screen moving the pointer to the top left corner and dragging it down (without clicking) will show you all the apps that are currently open. Here also the desktop will be one of the apps in the side bar, this will not show you all the programs open in the desktop individually. Moving the pointer to the bottom left corner of the screen and left-clicking will take you directly to the start screen, unless you are already in the start screen. In that case it will take you to the previously used app. Here again, if you were working in the desktop and came to the start screen – then clicking on the bottom left corner will take you back to the desktop.
The main new thing about the windows 8 is usage of apps. Right now there are some pretty cool apps already available in the windows store and Microsoft is hoping that many more apps will be made for the windows store. To open an app you just need to click on the tile of the app. If you are not able to find where the tile for a particular app is, then you can always use the search function in the charm to find where your app is. All apps don’t need to have a tile in the start screen. You can just delete the tile of apps you don’t frequently use and only keep those you do use. To see all the apps/programs that are currently installed in your computer – right click on the general area (any place other than on a tile itself). When you do this an option will appear on the bottom right corner of the screen called “All apps”. Clicking on this will take you to a screen that will show you all the installed apps. This includes the apps and the software/programs installed in the computer.
Once you open an app, right clicking on the general area brings out all the options that are available for a particular app. For example in the calendar app, right clicking on the screen brings out the options to view the calendar as day/week/month and also the option to add a new calendar event is also available only when you right click on the screen. The search and settings options in the charm should be used within an app to search for things and change setting of the apps respectively. To close an app, move the mouse pointer to the top of the screen and this will automatically change the pointer into a ‘hand’. Now click and drag it all the way down. This will close the app.
When you’ve moved the pointer to the top and clicked (after it turned into a ‘hand’), instead of dragging in all the way down if you drag it to either of the sides then the app ‘snaps’ to that side and now two apps can be viewed at the same time. This can also be done by moving the pointer to the top left corner of the screen and then moving the pointer down which will show you all the apps currently running. Then you can right-click on any of the app and then click ‘snap left’ or ‘snap right’. One of the apps will occupy about 25% of the screen and the other app 75% of the screen. You can run the music player in the smaller screen while working in the larger screen or something like that. Those who have used windows 7 will know that dragging a program all the way to the side re-sizes the program to fit half the screen. This option is still available for the desktop programs.
The start screen has a tile that you can click which will directly take you to the desktop. The Desktop side of Windows 8 is almost identical to Windows 7. The main difference is that the start menu is missing. So if you want to open programs you have to go the Charm and search for them or alternatively you can pin them to the Taskbar or create an icon for it in the Desktop. If you right click in the bottom left of the screen while in the Desktop, it brings out a small menu. This contains the Control Panel, Device Manager, Task Manager, Run, Command Prompt, Power Options etc., Most of the other things here are similar to Windows 7 so if you’ve used that before there is nothing that difficult here.
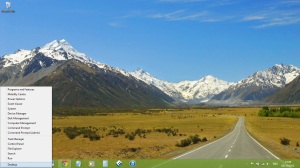
The first picture in this blog is my start screen. And those are the apps I use frequently. The official Mail app from Windows 8, Skype, WordWeb, Bento (News app), Calendar, Jetpack Joyride (Game), YouVersion (Bible), Quick Note, Milligram (Instagram), Official Music app, Tunein (Radio), Fresh Paint and MusixMatch (Song lyrics)
Once you get used to how things work in Windows 8 it is quite easy and fun to use. It generally feels much faster, but this could also be because I’ve just installed the OS newly. The only downside is the fact that some times it becomes a hassle when you have to work on a program running in the desktop and an app in the Metro UI. Lots of new apps are being added to the Windows store so I expect that there will many useful apps there in the future though apps are quite limited as of now.
Check out my personal blog if you have the time!!
